How to Install Arch Linux
Arch Linux is a x86-64 general-purpose Linux distribution which has been popular among the DIY enthusiasts and hardcore Linux users. The default installation covers only a minimal base system and expects the end user to configure and use it. Based on the KISS – Keep It Simple, Stupid! principle, Arch Linux focus on elegance, code correctness, minimalist system and simplicity.
I’m using Arch Linux right now, I’ve configured it in a way I like, and for my use. The official installation guide is available here.
Minimum Requirement
* A x86_64 (i.e. 64 bit) compatible machine.
* Minimum 512 MB of RAM (recommended 2 GB).
* At least 1 GB of free disk space (recommended 20 GB for basic usage).
* An active internet connection.
* A USB drive with minimum 2 GB of storage capacity.
Pre-Installation
1. Download the ISO
You can download the ISO from the official website. Arch Linux requires a x86_64 (i.e. 64 bit) compatible machine with a minimum of 512 MB RAM and 800 MB disk space for a minimal installation. However, it is recommended to have 2 GB of RAM and at least 20 GB of storage for a GUI to work without hassle.
2. Create a live USB of Arch Linux
We will have to create a live USB of Arch Linux from the ISO you just downloaded.
If you are on Linux, you can use dd command to create a live USB.
On Windows, there are several tools, like Rufus, to create a live USB.
3. Boot from the live USB
Plugin your USB and boot your system. While booting keep pressing F12, F10 or F2 (dependinging upon your system) to go into boot settings. In here, select to boot from USB or removable disk.
Once you select that, you should see an option like this: 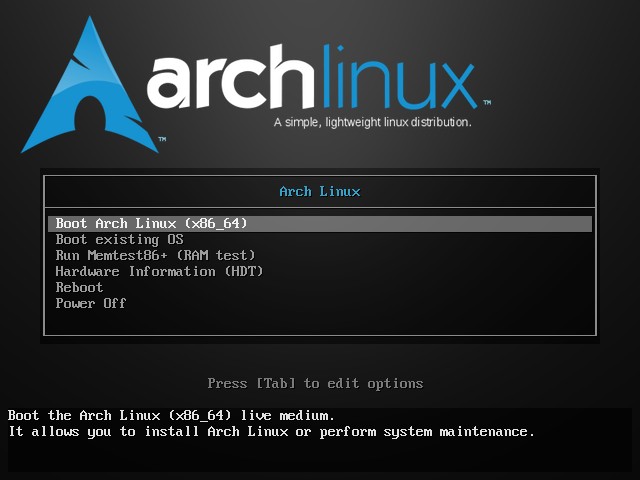
NOTE: If your system has both Intel and Nvidia GPU, you should blacklist nouveau.
You can blacklist it, by pressing
ein above step and type-modprobe.blacklist=nouveau. In some system it may happen thatlspcicommand freezes the system while installing. Above step can resolve it.
4. Partitioning Disk and Other stuffs to know.
* Partition the disk
This is where you have to be cautious. If you have multiple partitions (not the recovery ones), you can either use one of them or create a new partition from an existing partition. Your existing data will be safe if you have enough free space. Typically, you install Linux in under 15 GB(root), however, if disk space if not a concern, I advise using 30-40GB at least. For home, keep 40-50GB(/home), and for swap, keep it approximately to the RAM size. This way you can have more space at your disposal for downloading and keeping various files.
If you are on Linux, you can use parted to partition the disk.
On Windows, follow this, to partition the disk.
* Command Line
All commands will look like this:
root@archiso ~ # <command_you_type>
* Verify the boot mode
If UEFI mode is enabled on an UEFI motherboard, Archiso will boot Arch Linux accordingly via systemd-boot. To verify this, list the efivars directory:
# ls /sys/firmware/efi/efivars
* Connect to the Internet
For wireless connections, use:
# wifi-menu
to connect to available networks. You can check connection using
# ping 8.8.8.8
* Format the Partition
To list the partitions.
# lsblk -o name,size,type,mountpoint,fstype
Now, let your main harddisk is /dev/sdx(or it can be anything).
Now find the partitions you created. They will probably be the ones with the highest index (it’s still your job to verify that).
To format the main root partition (let it be /dev/sdxr) (the 50-100 gb one), use:
# mkfs.ext4 /dev/sdxr
where r is the root partition in the output of lsblk.
Similarly for home and swap.
# mkfs.ext4 /dev/sdxh
# mkfs.ext4 /dev/sdxs
where h, s is the home and swap partition in the output of lsblk.
* Mount the file systems
Mount the root partition to /mnt, for example:
# mount /dev/sdxr /mnt
Find out if your computer uses UEFI or not. The best way is to verify whether you have a vfat partition (in most cases /dev/sda1). If yes, then:
# mkdir /mnt/boot
# mkdir /mnt/home
# mount /dev/sdxh /mnt/home
# mount /dev/sdxe /mnt/boot
Here, /dev/sdxe is the vfat partition.
Mount the swap partition
# mkswap /dev/sdxs
Install the base packages
Use the pacstrap script to install the base package group and other useful stuff:
# pacstrap /mnt base dialog iw wpa_supplicant sudo
Configure the system
* Fstab
Generate an fstab file:
# genfstab -U /mnt >> /mnt/etc/fstab
* Chroot
Change root into the new system:
# arch-chroot /mnt
* Time zone
Set the time zone (for example Asia/Kolkata for India):
# ln -s /usr/share/zoneinfo/Asia/Kolkata /etc/localtime
Run hwclock(8) to generate /etc/adjtime:
# hwclock --systohc --localtime
* Locale
Open /etc/locale.gen using nano:
# nano /etc/locale.gen
Go to the line and remove the first #:
#en_US.UTF-8 UTF-8
Generate localisations with (execute):
# locale-gen
Open /etc/locale.conf using nano and add the following line:
LANG=en_US.UTF-8
* Hostname
Create the /etc/hostname file. A hostname is a name for your pc (You can set that to anything consisting of only letters):
myhostname
You will need to add a matching entry to /etc/hosts (the last line):
127.0.0.1       localhost.localdomain   localhost
::1             localhost.localdomain   localhost
127.0.1.1       myhostname.localdomain  myhostname
* Root password
Set the root password:
# passwd
* Boot loader If you have an Intel CPU, install the intel-ucode package
# pacman -S intel-ucode
Now, you need to remember if you have a UEFI system or not.
NO UEFI
# pacman -S grub os-prober ntfs-3g
# grub-install --target=i386-pc /dev/sdx
# grub-mkconfig -o /boot/grub/grub.cfg
Please replace x with the character of your harddisk.
UEFI
# pacman -S grub os-prober efibootmgr ntfs-3g
# grub-install --target=x86_64-efi --efi-directory=/boot --bootloader-id=grub
# grub-mkconfig -o /boot/grub/grub.cfg
The above steps may sometimes fail to recognize Windows. Just run the last command again(after reboot) to resolve it.
* New User
Now, its time to create a new user:
# useradd -m -G wheel -s /bin/bash <username>
To change the user’s password:
# passwd <username>
Now setup sudo.
# visudo
This opens up the sudo configuration file in vim.
## Uncomment the below line to allow members of group wheel to execute any command
# %wheel ALL=(ALL) ALL
Now, carefully place your cursor on the # just before %wheel and press x. This will remove the #. It will now look like this:
## Uncomment to allow members of group wheel to execute any command
 %wheel ALL=(ALL) ALL
Now type :wq to save and exit.
Reboot
Exit the chroot environment by typing exit or pressing Ctrl+D. Optionally, unmount all the partitions with:
# umount -R /mnt:
Finally, restart the machine:
# reboot
Now while booting choose grub as the default boot option.
After booting, you will encounter a black screen with option to login. You can now log in with your user.
Post-installation
See General Recommendations for system management directions and post-installation tutorials (like setting up a graphical user interface, sound or a touchpad).
For a list of applications that may be of interest, see List of applications.
Congratulations, you have installed the ARCH LINUX, oohh wheeee!
Thank you guys for reading this article, I’ll hope you enjoy it.